When presenting 3D reconstructions to the public, it is common to use either static images or at most models that rotate along an axis or point (such as those shown on Sketchfab). However it is possible to create more immersive and interesting models simply by using a navigation system that is more accessible and intuitive.
Unity3D offers the possibility of using a first person perspective to navigate a site which requires little effort and no coding. It can even be used to explore a site in VR.
In this article I will look at how to create an archaeological site that can be explored in the first person in Unity3D.
1. Modelling
I like modelling in Sketchup Pro, as it is very simple and intuitive while still being very flexible. I believe the free version now doesn’t support any useful export tools anymore, so if you don’t have a Pro version, feel free to use any other software to create your model (blender etc.). Otherwise, the video below provides information on how to model using Sketchup.
2. Importing
Unity3D has a free version that has most functionalities unlocked, so there is no need to purchase the pro version for this project.
Once you have your model in Sketchup, use the export settings to export the model as a .obj or .fbx file. Other files formats may work too, but I have found that .obj or .fbx is the most suited for the transfer of textures from one software to another.
Create a new project in Unity3D and make sure it is 3D. Then, drag the model files into the Unity asset panel. There should be an .obj file, a .mtl file and a folder with textures, or a .fbx and a folder. Sometimes Unity may have problems associating the textures with the model, so reexport it if there are any issues. If Unity crashes, copy the files directly into the project folder.
Once imported, drag the model file from assets into the hierarchy.
3. Add components
To allow users to “bump” into the model, it is necessary to add some components to the model itself. In the hierarchy search bar find all objects that have mesh in the name. Then, in the inspector panel add components. We need a Mesh Collider and a Rigidbody.
Make sure the mesh collider is not convex, and untick the Use Gravity toggle in the rigidbody. Finally, toggle the Is Kinematic toggle. If you have objects that should be moved by interacting with the user, it may be worth leaving the gravity on and making it not kinematic, so that the objects may move around.

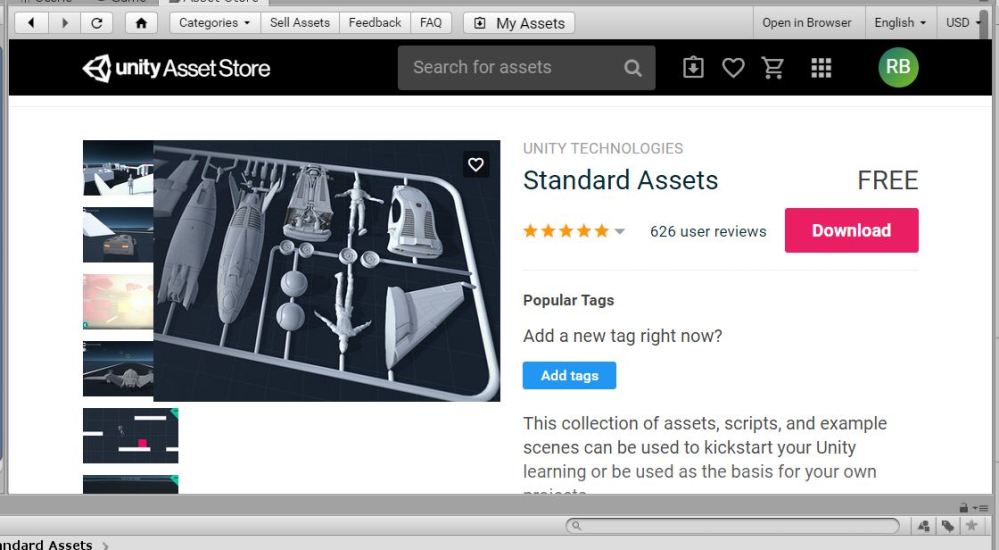
4. Import First Person Assets
In the Unity Store search for Standard Assets. Download the package, which is free to use.
Within the asset panel, locate the FPSController, which is commonly located at Assets>StandardAssets>Characters>FirstPersonCharacter>Prefab. Drag it into the hierarchy. If there is already a main camera in the hierarchy, delete it.
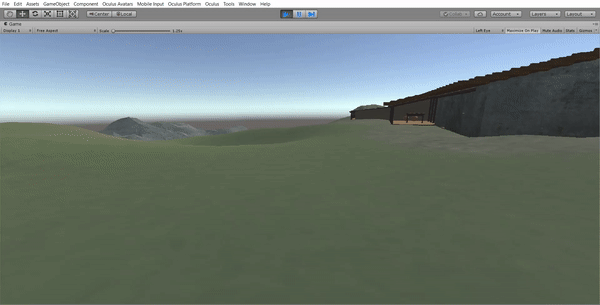
5. Explore!
Press the play button above the main screen. Now use arrow keys and mouse to explore the site!
Bonus
If you want to use an Oculus to explore your model, the process is very similar. You need to download the Oculus software from the website and have it open when using Unity3D. Then, follow the same steps as above, but download the Oculus Integration assets instead of the Standard assets. Import the equivalent First Person Controller and enjoy.
Additionally, you may use the Input Mapping to allow the use of a game controller for easier navigation.
There is a lot more that can be done with Unity3D, from interactive tools to information panels. But this is a simple and effective way to explore archaeological models without the need to write any code.
